Wind Power: Quality Control & Improvement with SpatialAnalyzer
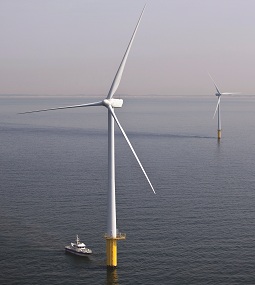
 The use of wind power is growing throughout the world and attracting more attention. In addition to being a clean, renewable source of energy with a virtually endless supply; the reserve is 10 times that of hydraulic power. Wind power also makes very little impact on the environment, and infrastructure construction and installation is flexible and can be accomplished in a relatively short timeframe.
Wind Power: Quality Control & Improvement with SpatialAnalyzer
The use of wind power is growing throughout the world and attracting more attention. In addition to being a clean, renewable source of energy with a virtually endless supply; the reserve is 10 times that of hydraulic power. Wind power also makes very little impact on the environment, and infrastructure construction and installation is flexible and can be accomplished in a relatively short timeframe.

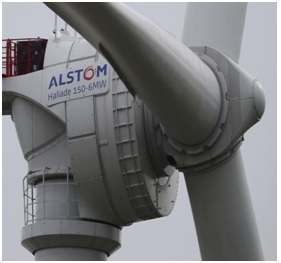
Alstom is a global leader in the field of transportation and power generation. In the power generation sector, it designs special control and automation system for power plants. About 27% of global power generation comes from Alstom. In China, Alstom is delivering comprehensive solutions for railway transportation, power generation, and power transmission both locally and globally.
“Made in China to supply the globe” has become a common phrase due to the rapid development of the Chinese economy and its manufacturing technology. More and more power-related parts are made in China and used around the globe. Maintaining mechanical integrity is a guiding principle for Alstom’s product development. To reduce technical risk, improve quality, and reduce delivery time and cost, 3D Measurement-China provides complete measurement solutions for the R&D stage as well as production stages.

Constructing Alstom’s wind power turbines requires high accuracy measurement because they are a large-volume, complex structures. In the machining process, the ability to control each dimension of the structure is crucial. Engineers must be able to efficiently provide numerous, accurate measurement results in order to meet specifications and correct the machining process accordingly.
One example of this is confirmation of the machine tool’s stability, offset of rotation error, and optimization of machining process. The measurement process combines a FARO laser tracker with SpatialAnalyzer (SA) to provide a high accuracy solution for Alstom. Below are a few highlights of how SA aids in the measurement process and analysis:
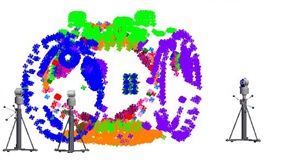
- Alstom’s turbine has a complex structure with scattered features that must be measured in several locations. USMN in SA is used to reduce additional error created by multiple stations through computation of measurement and combination of multiple stations, and to optimize the measurement network.
- SA’s relationship fitting capability can deliver the best results through constraint conditions and modification of weights. Since most Alstom’s products are not coordinated with axis relationship fitting, this makes it easier to make reasonable fits between the parts and CAD.
- All data in SA has traceability and RMS control value during measurement. Points with operational error can be removed from root and rigidity, and accuracy and traceability can be guaranteed.
- SA’s effective temperature compensation meets Alstom’s measurement requirements.
- SA shows station information accurately, and measurement data and the entire measurement process is clear and easy for management to understand.
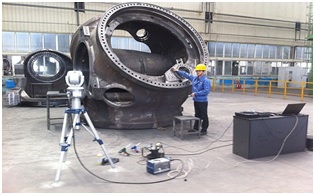
The photo below is the onsite FAI measurement for ALSTOM’s wheel base (or hub) by 3D Measurement-China.
The measurement of the wheel boss requires six stations, and the wheel boss has to be turned during the process. Twenty common points are spread on the boss according to actual position of each station. The spread of common points must be triangular in space, and more than six points must be measured from the first station. As common points are the bridge for next stations, its stability and reliability must be guaranteed.
Measurement process:
- Fix tracker on first station with reasonable location.
- Clean 20 common points and features to be measured.
- Set up single point RMS error at 0.02mm in SA.
- Measure 20 common points.
- Move tracker to second location and measure 8 common points.
- Realize the fit of second station with first station by way of USMN in SA. In accordance with the above process, finish the measurement at second and third stations.
- Turn the wheel boss and finish location of forth station. With newly set common points, finish the measurement of fifth and sixth station. The movement of the boss must be monitored in real time for each station.
- Import CAD model into SA, then align part and CAD with relationship fitting.
- Finish the temperature compensation of all data.
- Create inspection report.

Sign up to receive our eNewsletter and other product updates by clicking here.
